Hey everyone, it’s John, welcome to my recipe page. Today, I will show you a way to make a special dish, chickpea vegetable quiche. One of my favorites. This time, I’m gonna make it a little bit tasty. This will be really delicious.
Chickpea Vegetable Quiche is one of the most favored of current trending meals in the world. It’s simple, it is quick, it tastes yummy. It’s appreciated by millions daily. They are fine and they look fantastic. Chickpea Vegetable Quiche is something that I’ve loved my entire life.
When you're making this chickpea and vegetable quiche, if buckwheat flour isn't available, just substitute extra whole wheat flour. Also, when your making the garbanzo (chickpea). A classic vegan quiche made with a base of tofu and chickpea, spring vegetables, and packed with savory flavor.
To get started with this recipe, we have to first prepare a few components. You can cook chickpea vegetable quiche using 27 ingredients and 25 steps. Here is how you cook that.
Ingredients
The ingredients needed to make Chickpea Vegetable Quiche:
- Take For crust
- Take 1 cup Chickpea flour
- Take 1/4cup Wheat flour
- Take 4 tablespoon Ghee
- Make ready 1/4 teaspoon Salt
- Get 1/4 teaspoon red Chilli powder
- Take as required Chilled water
- Prepare Ingreients of filling or stuffing
- Prepare 1 small size green capsicum
- Take 1 small size red capsicum
- Make ready 1 large size onion
- Make ready 1 small piece of purple cabbage
- Get 2 tablespoon green peas(I used frozen)
- Get 2 tablespoons blanced and minced spinach
- Make ready 4-5 cherry tomatoes (halved)
- Prepare 1 teaspoon chilli flakes
- Take 1/2 teaspoon kasuri methi
- Make ready 1 tablespoon olive oil
- Make ready to taste Salt
- Get 2 tablespoons grated cheese
- Get For the liquid filling(egg mixture)
- Get 2 eggs
- Take 1/2 cup cooking cream(you can use fresh cream)
- Make ready 1/2 teaspoon chilli flakes
- Take 1 pinch nutmeg powder
- Prepare 1 pinch salt
- Take 1 tablespoon chopped coriander leaves
Thanks to the power of chickpeas, it is — and it's delicious. Without the milk and eggs, this sweet potato- and spinach-flecked quiche still manages to be..mini crustless chickpea quiche, chickpea omelette muffin, vegan egg muffins or savory chickpea flour muffins. You may have to taste test it with my other Vegetable Frittata using tofu as the base! This wholesome vegan quiche is packed with healthy vegetables, and a decadent pie crust- yet the This chickpea flour quiche recipe is not only super delicious, but it is also wholly dairy-free, egg-free.
Instructions
Instructions to make Chickpea Vegetable Quiche:
- To make the pie crust, first put together chick pea flour, wheat flour, chilli powder, kasuri methi and salt into a bowl.
- Mix together. Add in ghee and mix together with your finger tips. Make a breadcrumb like crumbly mixture.
- Now make a rough dough with a little bit of chilled water.
- Cover and leave the dough in the fridge for 15 minutes.
- Keep pie dish(7″size)ready by brushing some oil.
- Take the pie dough out of the refrigerator after 15 minutes and roll it to 1/4th inch thick round disk.
- Now transfer the sheet to the pie dish and spread by pressing them on sides and bottom of the dish.Trim the sides.
- Prick the base of the pie with a fork so that it will not puffed up while baking.
- Now cut the baking paper or foil into rounds and place it on the base of the pie.
- Spread some dry beans like rajma/kidney beans over the butter paper/foil. This will prevent from swelling up the base of the pie crust while baking.
- Preheat oven to 180 degrees C for 10 mins.
- Bake the pie crusts for 15-20 minutes (until the side of the pie turns a little reddish). This is called blind baking.
- After cooling, remove the butter paper/foil and dry bins.
- Now for the filling, chop the vegetables thin long strips. Also chop onion.
- Heat 1 tablepoon oil in a non-stick pan and add in chopped onion. Saute until onions become translucent.
- Also add in green peas,corn and minced spinach.
- Stir well with salt, chili flakes, nutmeg powder and kasuri methi for more 2-3 minutes.
- At last add in cherry tomatoes. Remove from heat.
- Take the baked tart and spread grated cheese at the base of the tart.
- Spread the prepared fillings over the cheese.
- Break 2 eggs in a bowl.Beat well with a fork and add 1/2 cup of of cream, chilli powder, nutmeg powder, chopped coriander leaves and salt.
- Now pour this mixture over the filling of the pie.
- Keep them again in the preheated oven at 180 degrees C and bake until a little golden color. I baked for 20 minutes.
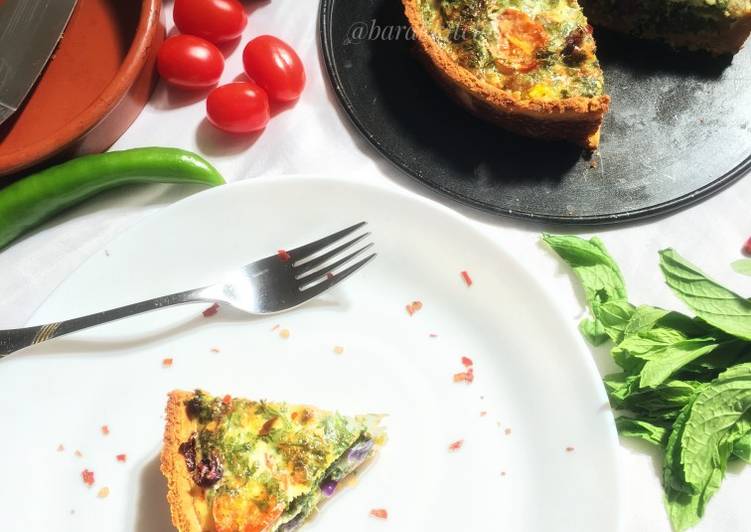
- Delicious and healthy quiche is ready now. Your house will fill with nice aroma of baked quiche.
- Cut in triangles and serve warm as snack, side dish for lunch or even as breakfast. You will fill little crunch of the crust with creamy fillings and wonderful flavour.
Want to know what to do with chickpeas? Here are our top recipes to use canned chickpeas, tagines, chickpea stews and hummus. I make this low fat quiche when I crave something homey, brunchy and nutritious. Low Fat Chickpea Quiche with Sourdough Crust. Once the vegetables are roasted you are ready to assemble the quiche.
So that is going to wrap this up for this special food chickpea vegetable quiche recipe. Thanks so much for your time. I’m sure that you will make this at home. There’s gonna be interesting food at home recipes coming up. Remember to bookmark this page in your browser, and share it to your family, friends and colleague. Thank you for reading. Go on get cooking!
Print this page