Hello everybody, it’s me again, Dan, welcome to our recipe site. Today, we’re going to prepare a special dish, namakpare. It is one of my favorites food recipes. For mine, I will make it a little bit unique. This is gonna smell and look delicious.
Namakpare is one of the most favored of recent trending meals on earth. It is easy, it’s quick, it tastes yummy. It’s appreciated by millions every day. Namakpare is something that I’ve loved my entire life. They are nice and they look wonderful.
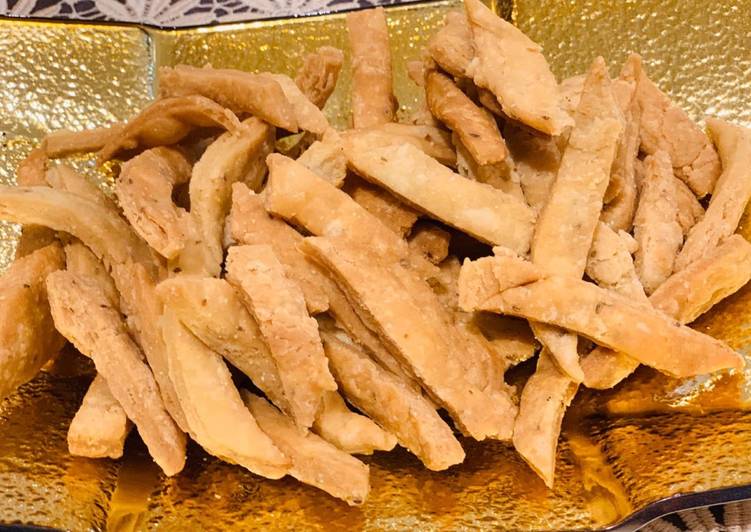
Namak Para also known as crispy nimki or namkeen pare. it's very crispy and crunchy namkeen for tea time. Its one of the most common snack you will find in. Khasta Namak Para - Layred Nimki - Khasta Mathri namakpare Namkeen.
To begin with this particular recipe, we have to first prepare a few ingredients. You can cook namakpare using 8 ingredients and 13 steps. Here is how you can achieve it.
Ingredients
The ingredients needed to make Namakpare:
- Get 1 cup maida(All purpose flour)
- Prepare 2 tbsp Sooji
- Take 1/4 tsp Black pepper powder
- Make ready 1 tsp Sesame seeds
- Prepare 1/4 tsp Carom seeds (Ajwain)
- Prepare to taste Salt
- Prepare as needed Oil
- Prepare 1/4 cup water
Make sure to place just enough namak paras so you can turn them over easily when frying. Namak para (or namakpare), also nimki or nimkin (or namkin) is a crunchy savoury snack eaten in the Indian Subcontinent. It is also referred as Mathri sometimes in some parts of Punjab and Uttar Pradesh. Namak para is ribbon-like strips of pastry (made up of refined flour, oil and water).
Instructions
Instructions to make Namakpare:
- Take all purpose flour, sooji, salt, sesame seeds, black pepper powder, and carom seeds in a bowl. Mix well.
- Add oil and rub it with flour mixture and it will resemble crumbly texture.
- Now add little water at a time and start kneading the dough. Make semi-soft (similar to paratha) dough.
- Water quantity may vary. dough should not be too tight or stiff (like puri) or not too soft like roti.
- Cover the dough and let it rest for at least 15 minutes.
- After 15 minutes, knead the dough once again. Divide it into two equal portions.
- Flatten it out between your palm.
- Start rolling it into a big circle (about 9-10 inch in diameter) using rolling pin and rolling board. While you are rolling, on other side heat the oil in a pan on medium heat for frying namak pare.
- Cut into desired shape using sharp knife.
- Once oil is hot, add few pieces of namak para in the oil. Do not over crowd them. Flip them halfway through for even browning,
- Fry from both sides till it become golden brown and crispy.
- Remove it to the paper towel lined plate, so it absorbs the excess oil.
- Let it cool completely, about 20 minutes. And it will become more crispy. Once cooled down completely, you can serve them or store them in a airtight jar or container.
This step by step photo recipe of namak pare is not just about preparing traditional crispy deep fried snack from base ingredients Namak Pare Recipe (with Step by Step Photos). #namakpare. Namak pare recipe (Namak Para or Nimki) - easy to make snack recipe. Make a big batch, store in the dabba and enjoy as a snack with a cup of tea. Namak Pare is a popular savory crunchy snack from India. I made this snack for Diwali.
So that is going to wrap this up for this exceptional food namakpare recipe. Thank you very much for reading. I am sure you can make this at home. There is gonna be interesting food in home recipes coming up. Don’t forget to bookmark this page in your browser, and share it to your loved ones, colleague and friends. Thank you for reading. Go on get cooking!
Print this page